What is MQTT? MQTT is the machine-to-machine protocol of the future. It is ideal for the “Internet of Things” world of connected devices. Its minimal design makes it perfect for built-in systems, mobile phones, and other memory and bandwidth sensitive applications.
This beginner’s guide from CloudMQTT will give a brief, easy understanding of the protocol, including important concepts and steps to set up a connection. Get ready to learn the basics of MQTT including:
- Topics and Wildcard Matching
- Brokers
- Payloads
- Set up a connection
- Publish and subscribe messages

The MQTT protocol keeps the messaging architecture sleek and low-maintenance. Read on to learn more about the benefits of MQTT.
What is an MQTT Topic?
Think of an MQTT topic as a queue system arranged in a hierarchy similar to folders and files in a storage system. Topics have names that can be separated into subtopics using the forward slash as a delimiter. The forward slash should only be used when necessary, however, as it creates a new topic. The figure below illustrates what a home IoT solution would look like, with the topics Home, Kitchen, Fridge, Temperature, etc.:
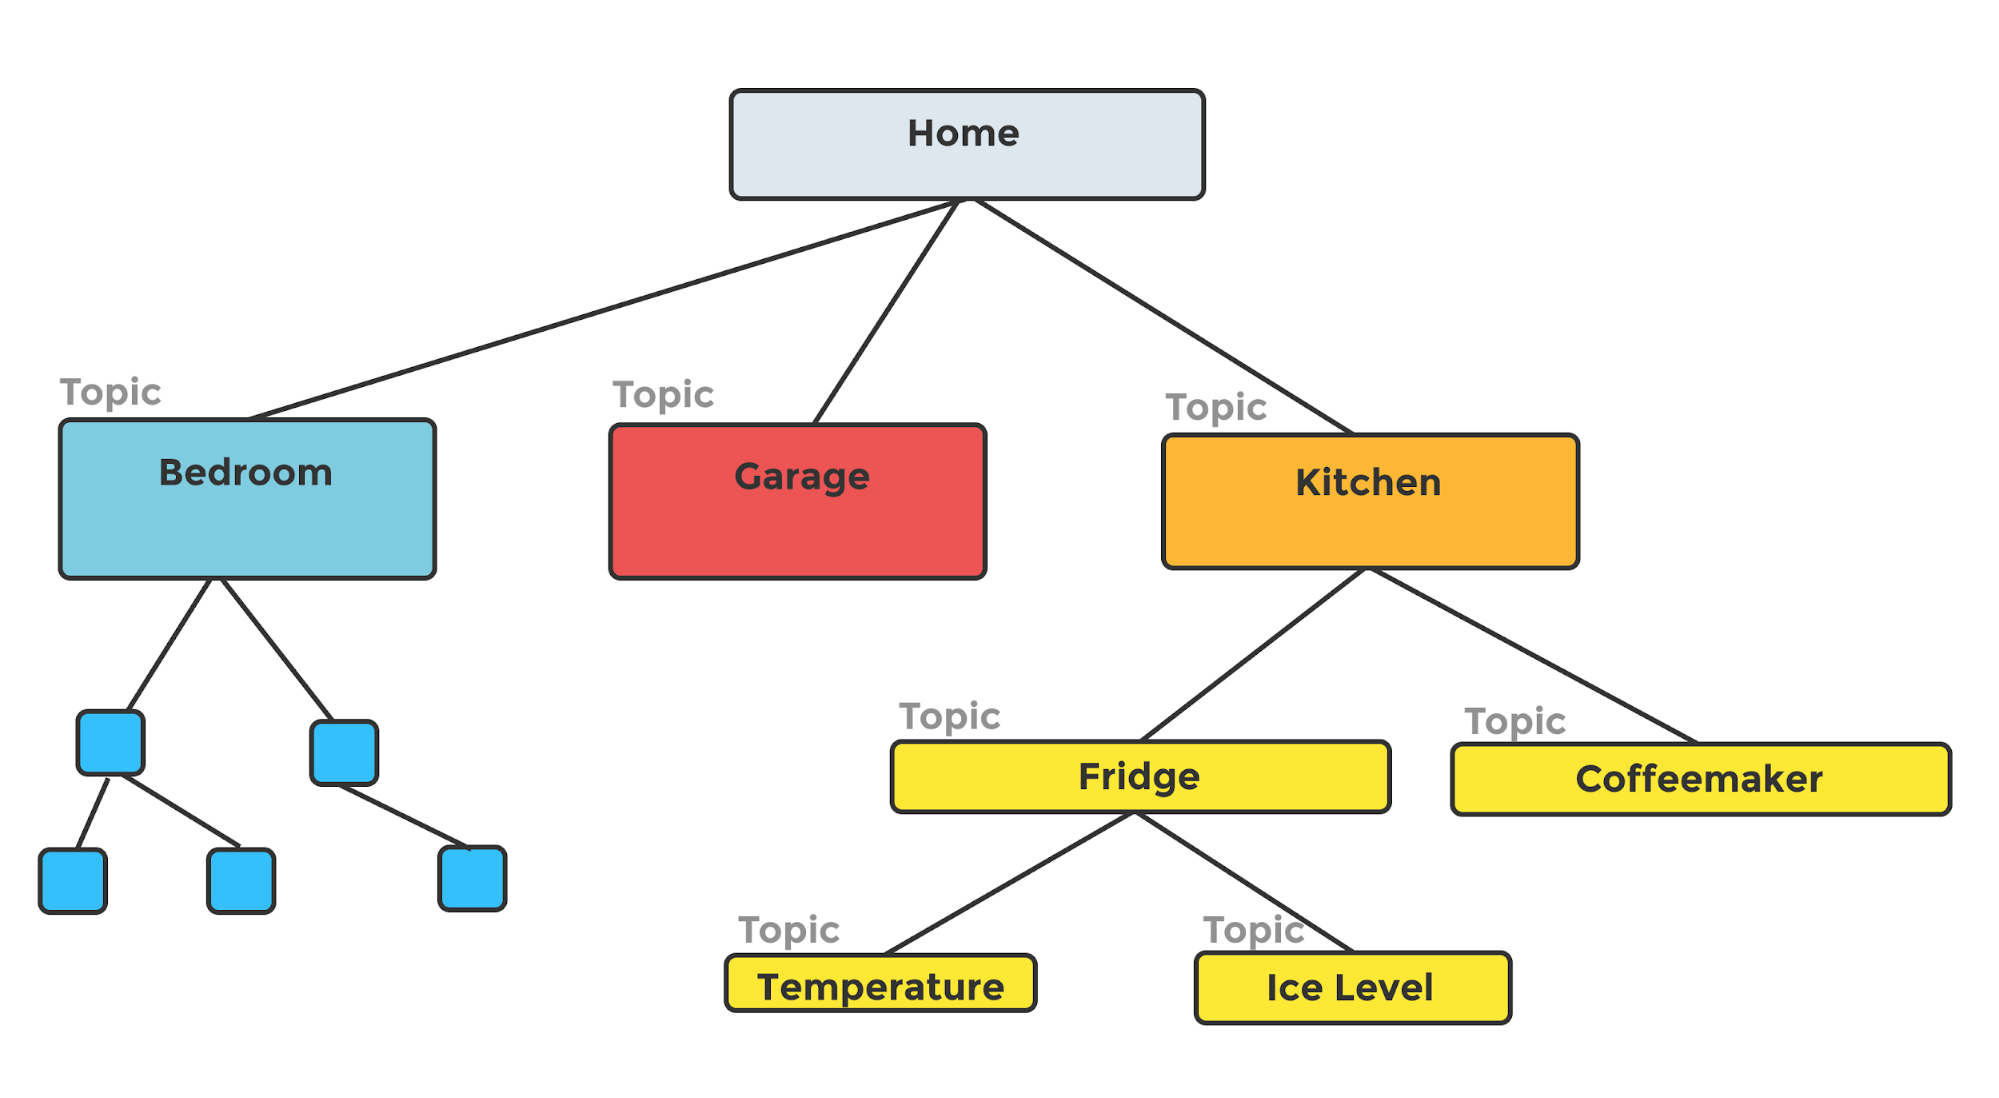
Unlike in a message queue, MQTT topics do not need to exist in the broker prior to publication. Using the address provided by the publisher, the broker partitions a single topic into smaller subtopics. Topics are case-sensitive, so, for example, the addresses Home/Kitchen and home/kitchen would reference two different topics.
Another MQTT operation to keep in mind is that brokers do not persist messages unless they are explicitly told to do so.
Wildcard Matching in MQTT
It is possible to subscribe to multiple parts of the topic hierarchy using wildcard matching.
Use the # wildcard at the end of the address to receive messages from topics in all subsequent levels of the tree. As an example, the address my_topics/+/topic_level3/# causes a consumer to receive messages sent to topic_level3. Subscribers receive messages only when topic_level3 is a child of a topic directly under my_topic. Due to the hash mark, the subscription also receives messages from all topics beneath topic_level3.
The + wildcard replaces a single topic level. Use the plus sign in any part of the address.
Using the CloudMQTT broker
CloudMQTT, based on Eclipse Mosquitto, allows for the creation and scale of an MQTT messaging system with ease. Gain access to a broker and topic manager without the need to manage hardware.
We will use CloudMQTT to explore the MQTT protocol. You can use any language you like to connect to your broker as long as an MQTT client exists.
How do I set up a CloudMQTT broker?
A cloud broker is an automatically managed alternative to using an operating system such as Ubuntu to install an MQTT broker. CloudMQTT works similarly to an Azure IoT MQTT broker with simplified administration and an intuitive user interface. Pay for only what you need and scale at the click of a button.
Setup the broker at the CloudMQTT website by:
- Choosing a plan
- Configuring your server
- Optionally setting a usage alarm
- Creating a user
- Connecting to your server
You can set up your service in minutes, then connect to your new IoT cloud on AWS with any chosen programming language, such as Python.
Choose your plan
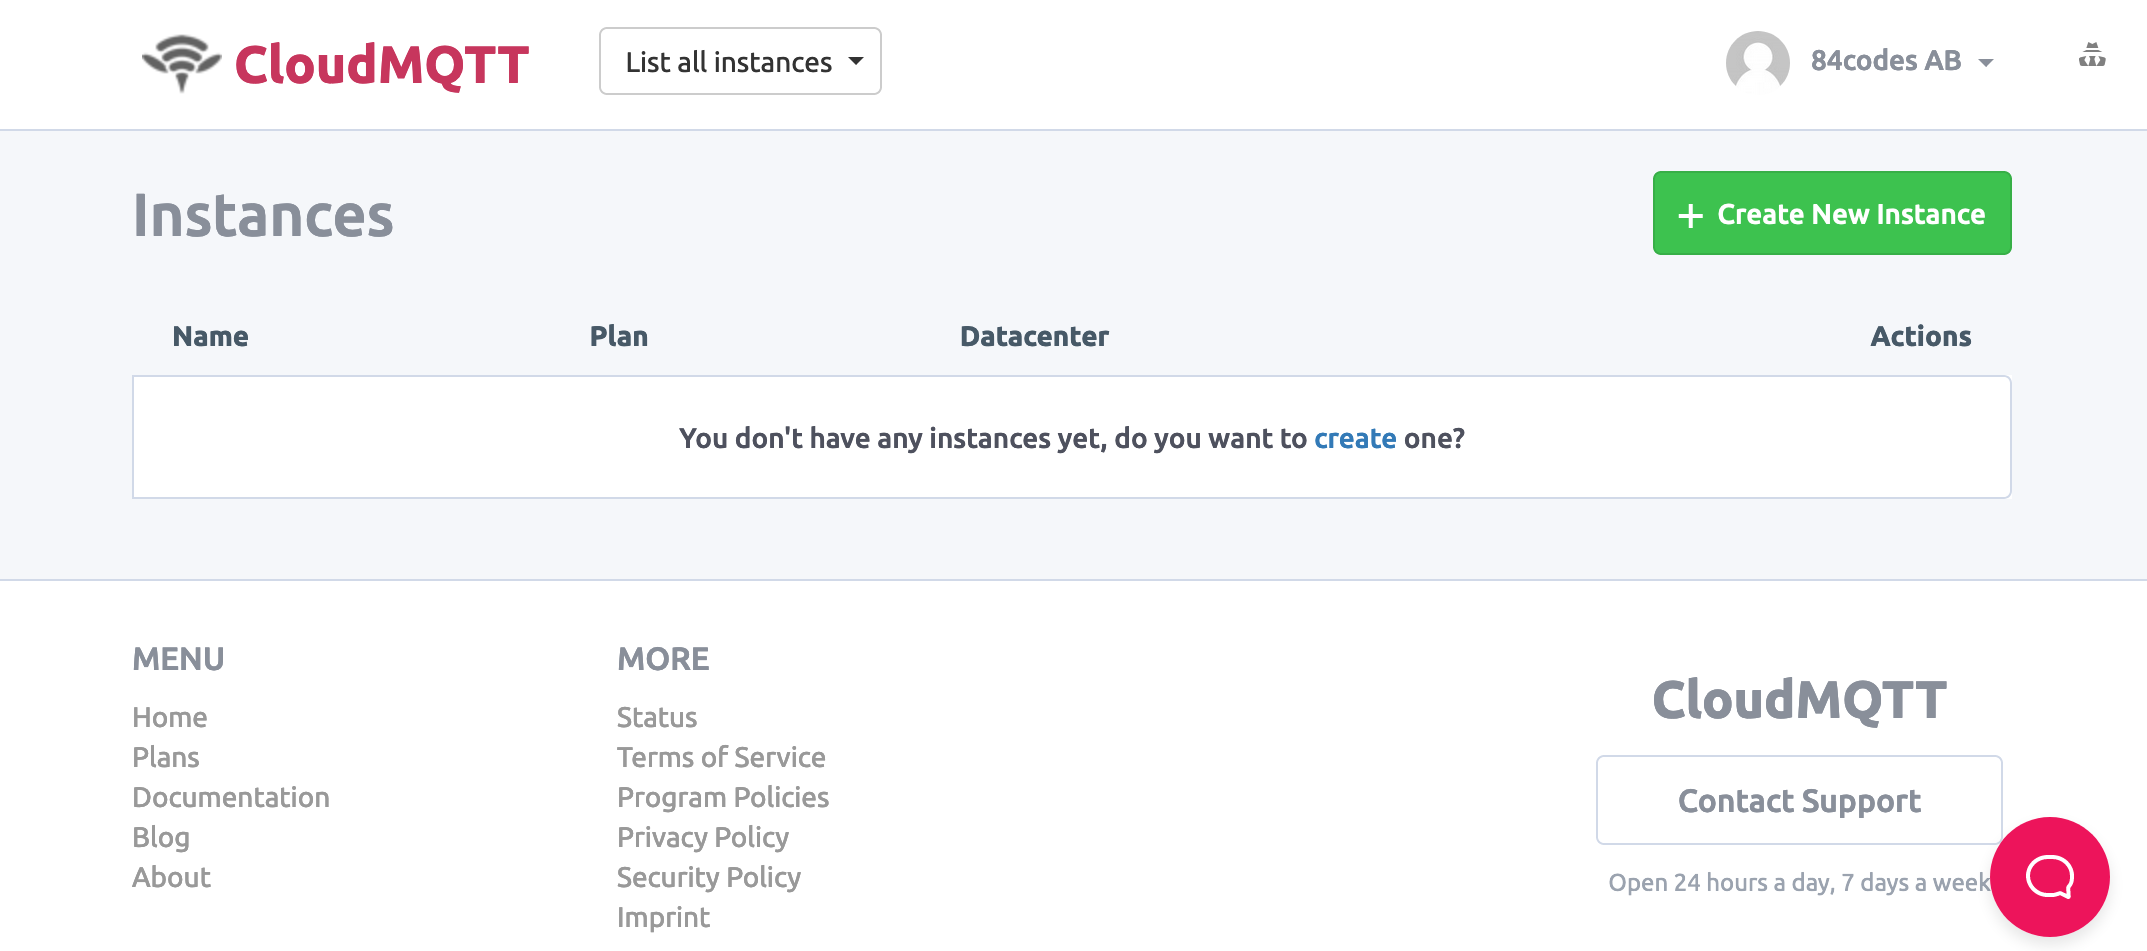
Login to the CloudMQTT website and navigate to the instances page. Click on the Create a New Instance button at the top right of the page:
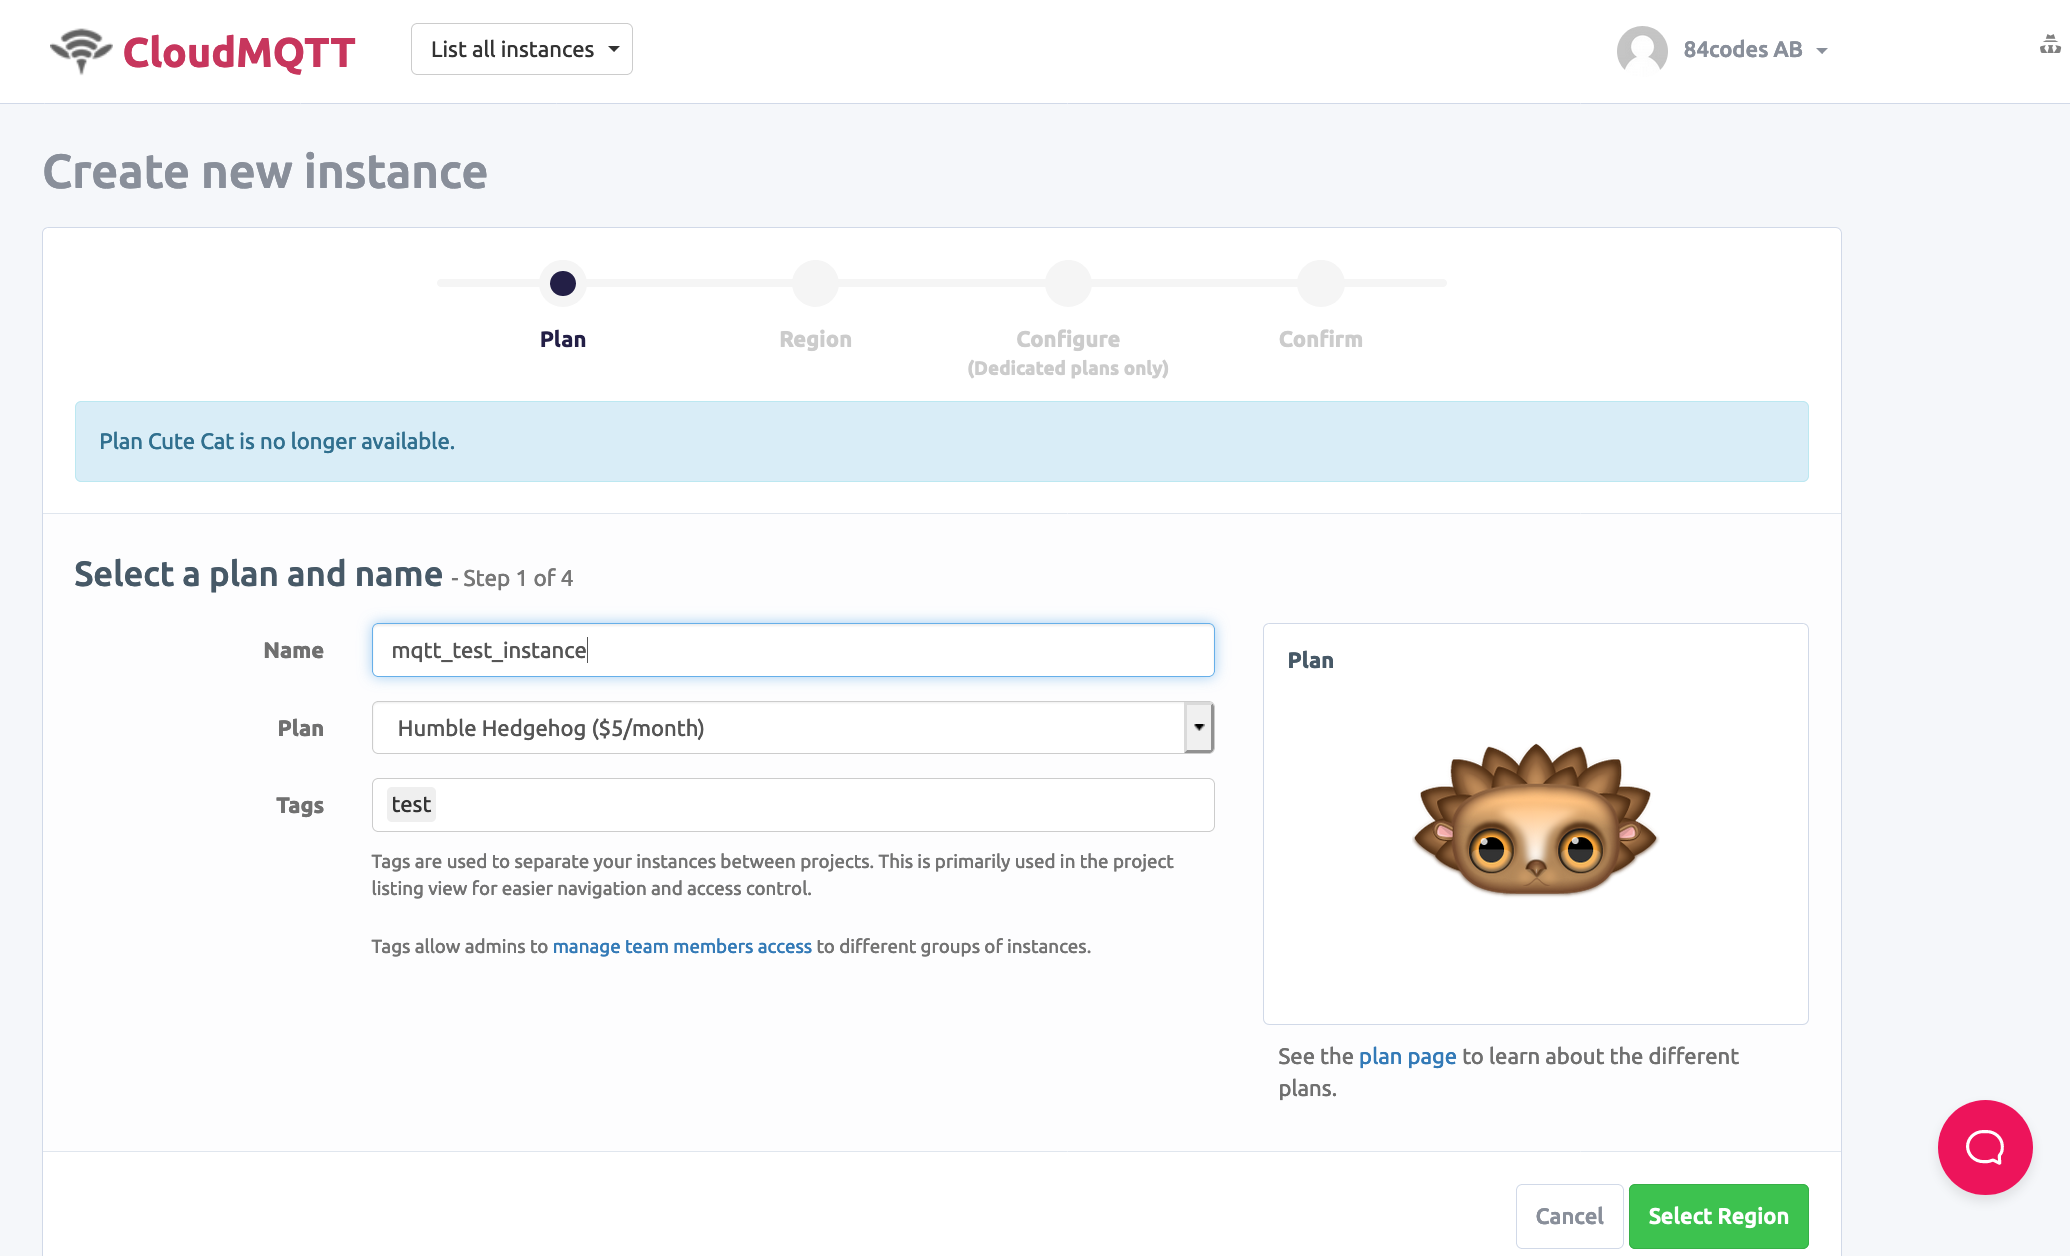
Name and choose your plan on the subsequent page. Add a useful tag to identify your broker later:
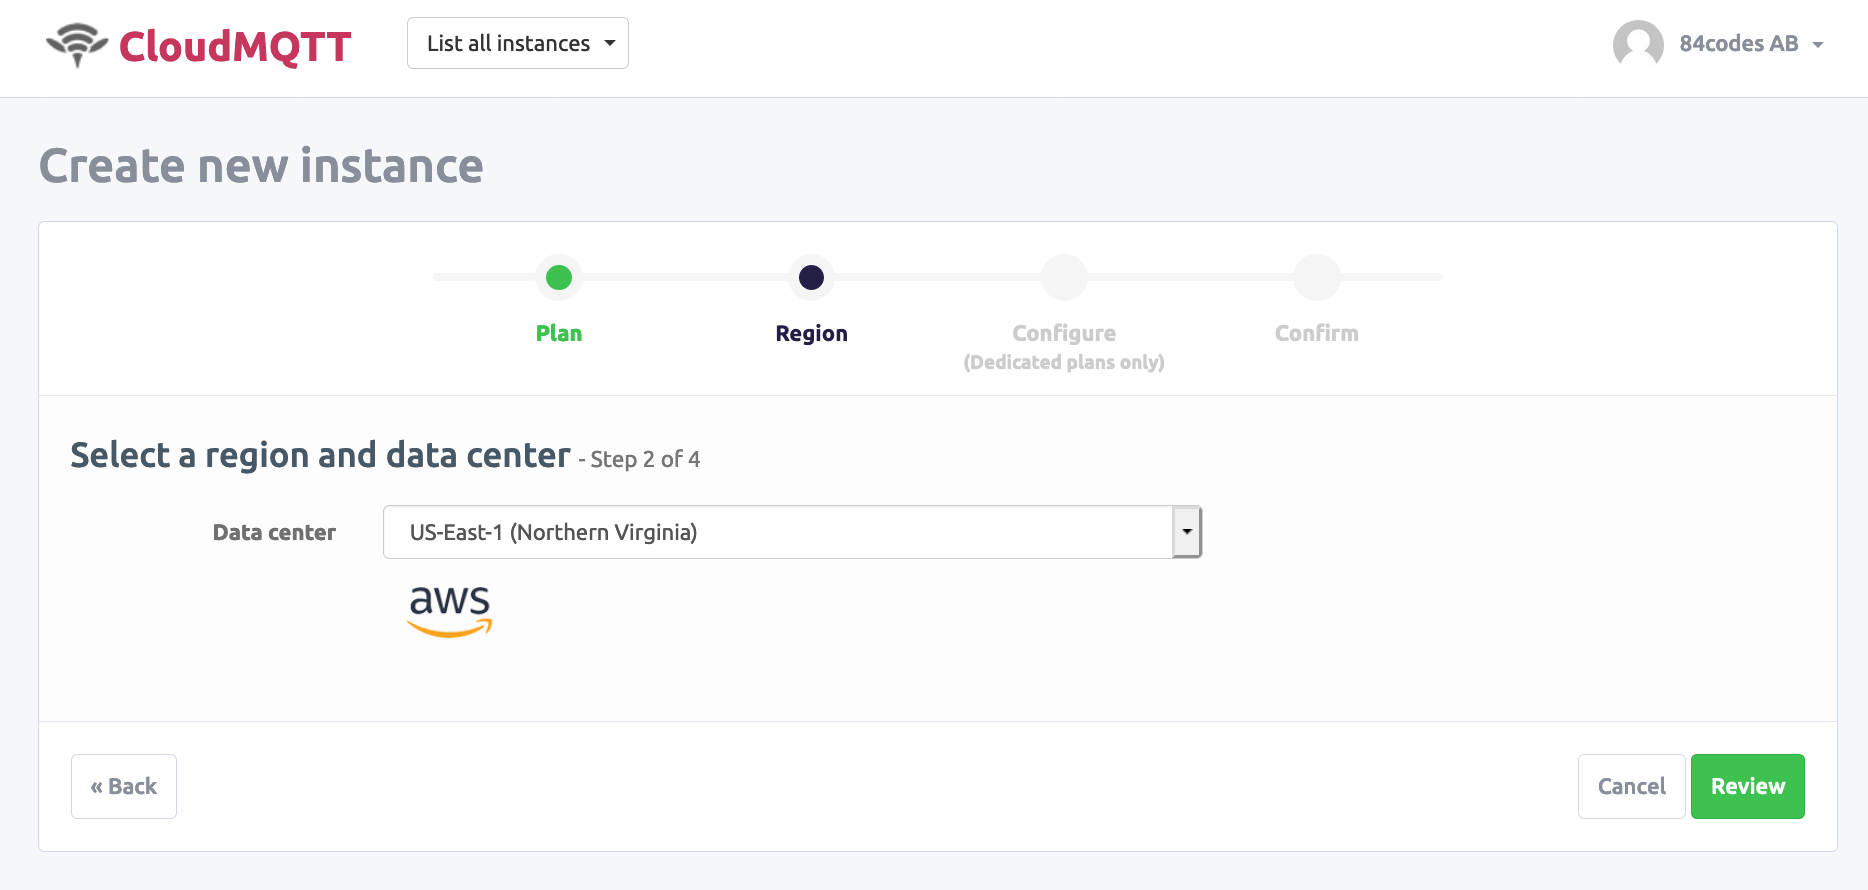
Pick a region on AWS centrally located to your devices. We chose US-East-1.
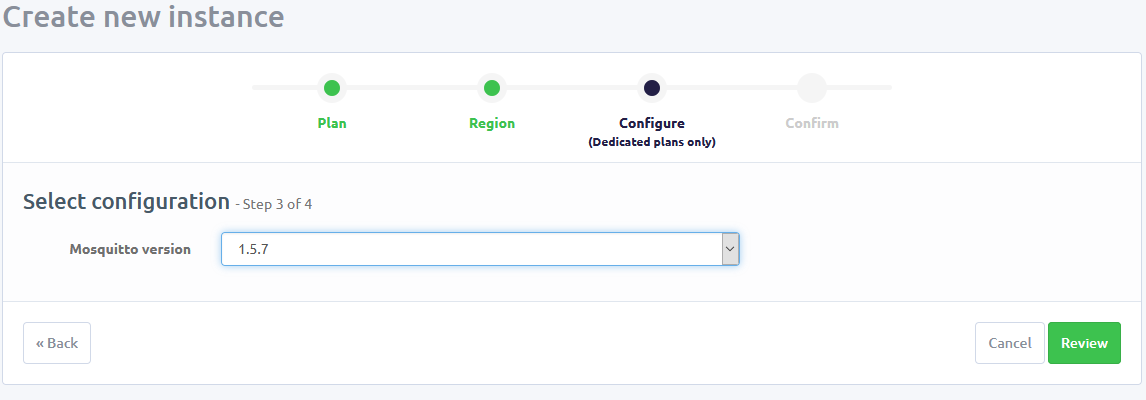
Finally, configure your system and confirm its creation. You can choose which version to use on dedicated plans.
You now have an AWS MQTT broker. Your new system appears underneath the tag you set on the first configuration page.
Configuring your Secure Server
Your server already follows the security and privacy guidelines set by AICPA and GDPR and is audited against the Security and Availability Trust Services criteria. Beyond IoT device security, we offer additional features such as the ability to:
- Connect to an Amazon Kinesis Stream
- Send messages directly to your broker
- View usage statistics
- Create bridges between MQTT brokers
- Set alarms
- Monitor connections
To make any of these configurations, simply navigate to your instance homepage. Actions are available from the menu on the left-hand side of the page.
How to set an alarm in CloudMQTT
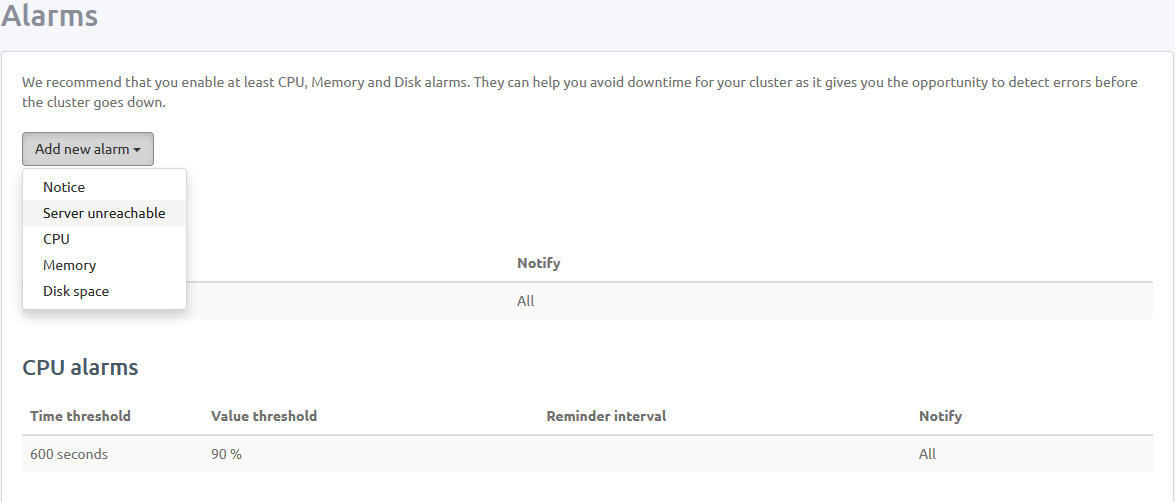
CloudMQTT allows you to set alerts and comes with preset alarms for CPU and memory usage greater than 90%. Receiving an alarm is useful if resources run out as you scale or if the server becomes unreachable.
Navigate to the Alarm tab in the menu on the instance homepage to start creating this type of notification. We will create a ‘server unreachable’ notice as an example. Click on the drop-down menu under the Alarms section and select server unreachable:
Set a time interval to receive alerts after the server becomes unreachable. Set a reminder interval for periodically receiving messages until the issue is resolved. Finally, add recipients for the alarm.
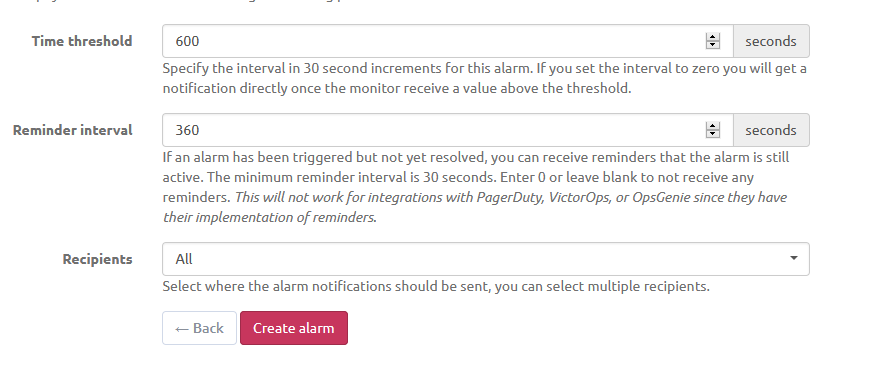
Click the Create Alarm button to be redirected to the alerts tab. Note that the new alarm appears under the Server unreachable alarms subsection in the Alarms section of the page.
Create a User
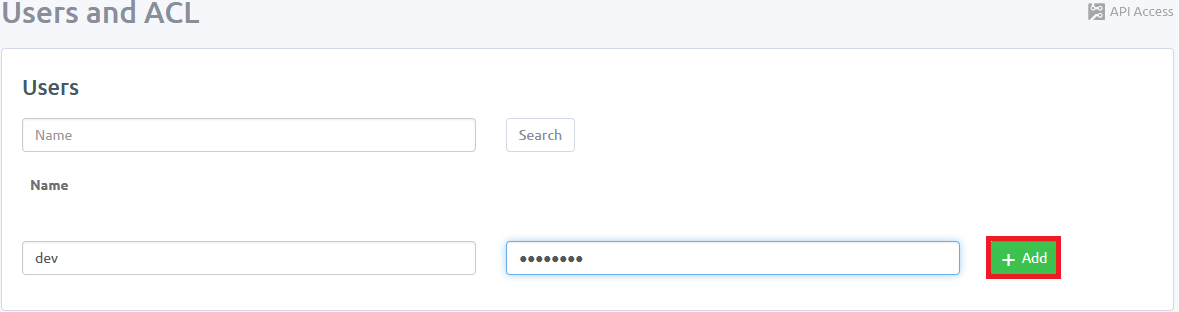
Creating users allows for limited access to certain topics. Set up as many users as needed in CloudMQTT from the Users and ACL tab.
Add users by navigating to the Users and ACL page from the broker menu. Enter a username and password and click Add to the right of the password prompt:
You can set read and write permissions for specific topics in the ACL section. Allow several minutes for the system to create new users and rules.
Test your Connection
You are now ready to test connections to your MQTT server. Navigate to the Details page and note the Server address and Port.
We will use the Paho MQTT library in Python. Install paho-mqtt as follows:
pip install paho-mqttRun the following code to send a message to your server:
def on_connect(client, userdata, flags, rc):
  msg = 'Connected to MQTT @ {}\n'.format(str(rc))
  print(msg)

def on_publish(client, obj, mid):
  msg = "Published {} message \n".format(str(mid))
  print(msg)

def on_log(client, obj, level, string):
  msg = "LOG: {}".format(string)
  print(msg)

topic = "getting_started/test"
mqttc = mqtt.Client()
mqttc.on_connect = on_connect
mqttc.on_publish = on_publish
mqttc.on_log = on_log
mqttc.username_pw_set(, )
mqttc.connect(, )
mqttc.publish(topic, "Hello World!")
mqttc.loop_forever()
We sent a “Hello World!” message to the getting_started/test topic.
Receive and check the message with the following code:
def on_connect(client, userdata, flags, rc):
  msg = "Connected to MQTT @ {}\n".format(str(rc))
  print(msg)

def on_message(client, obj, msg):
  msg = "Received \n{} \nto\n {}\n".format(str(msg.payload), msg.topic)
  print(msg)

def on_subscribe(client, obj, mid, granted_qos):
  msg = "Subscribed to Topic: {}".format(str(mid))
  print(msg)

def on_log(client, obj, level, string):
  msg = "LOG: {}".format(string)
  print(msg)

topic = "getting_started/test"
mqttc = mqtt.Client()
mqttc.on_message = on_message
mqttc.on_connect = on_connect
mqttc.on_subscribe = on_subscribe
mqttc.on_log = on_log
mqttc.username_pw_set(, )
mqttc.connect(, )
mqttc.subscribe(topic, 0)
mqttc.loop_forever()
If you receive a message, you are successfully connected to your server. Otherwise, check your ACL rules, username, and password. CloudMQTT offers documentation for debugging including Python sample code.
Setting up the MQTT Cloud in CloudMQTT
This article demonstrated how to set up an MQTT cloud broker via CloudMQTT and took us through creating an instance from the CloudMQTT website in minutes. Now you are able to connect as many devices as you need, scaling as you grow.
It’s fast and easy to start your own CloudMQTT broker today and find out how powerful a lightweight can be.